Hanging a gallery wall is the perfect way to display art, but knowing how to hang a piece of art can seem daunting, especially when you’re moving to a place for the first time. The wall may be painted, but if you can’t see any markings or nail holes, you may be faced with a brand new wall and you may not know what to do. I guess that’s why my family always calls me to hang things for them.
image from pinterest
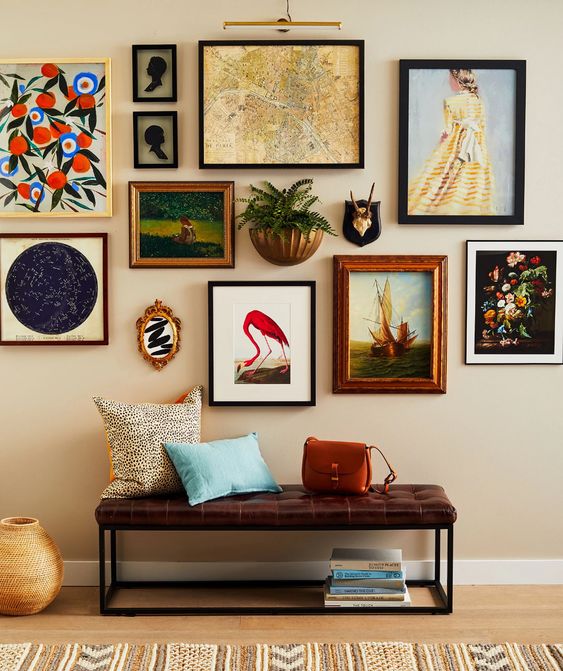
Hanging a gallery wall is an excellent choice when you want to create an eye-catching decorative statement for your home. This way of decorating not only showcases your favorite art, but also gives the space a unique personality. Here’s a guide on how to hang a gallery wall in 5 easy steps to make your home more inviting.
Before we start, we need to check whether our tools are complete, because good tools can make the whole thing more efficient, and who doesn’t want to see the fruits of their labor quickly? Here are the tools you need to prepare:
pencil
scissors or utility knife
hammer
ruler or tape measure
level instrument
kraft paper
adhesive tape
wall studs
Next we will follow the steps to start laying out and installing the gallery wall
Table of Contents
Step 1: Prepare your artwork
First you need to collect and prepare the artwork you plan to display. This may include paintings, photographs, posters, decorations, etc. If you want to build a photo wall with family photos, you can choose whether you need a photo frame to create it. Everyone’s preferences are different, you just need to follow your own ideas, because that is your art. Make sure you’ve chosen pieces that suit your theme and space, and keep them clean to ensure they shine on the wall.
Step 2: Determine the location on the wall
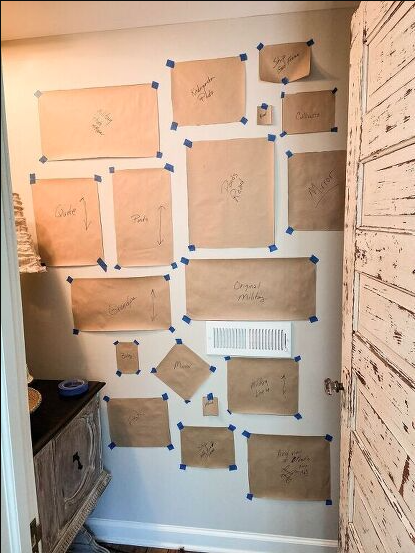
The most difficult part of hanging a gallery wall is deciding where to hang the painting. Before deciding on a hanging location, we need to consider the overall layout of the gallery wall. First trace all the pieces on vellum and then cut them out. Mark the photos on each page. This is helpful for hanging your art at the proper level. Next, tape each cutout to the wall to get a feel for its layout. You can try different arrangements several times to find the one that works best for your space.
image from pinterest
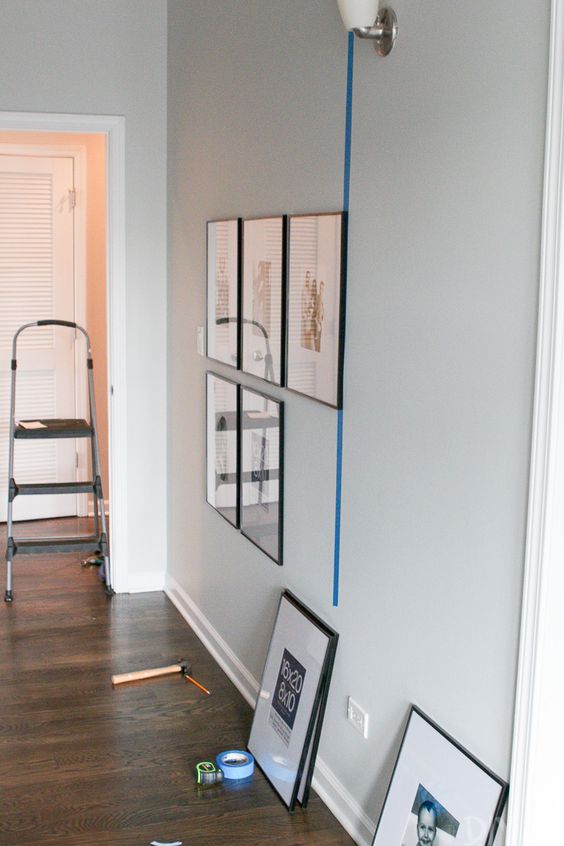
Step 3: Measure and Mark
Use a measuring tool, such as a tape measure, to ensure your art is positioned accurately on the wall. Measure the height and width of each piece to determine their center point. Then, use a pencil to lightly mark the center point of each piece on the wall.
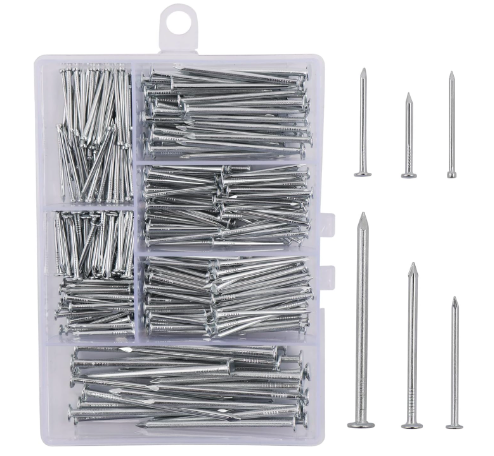
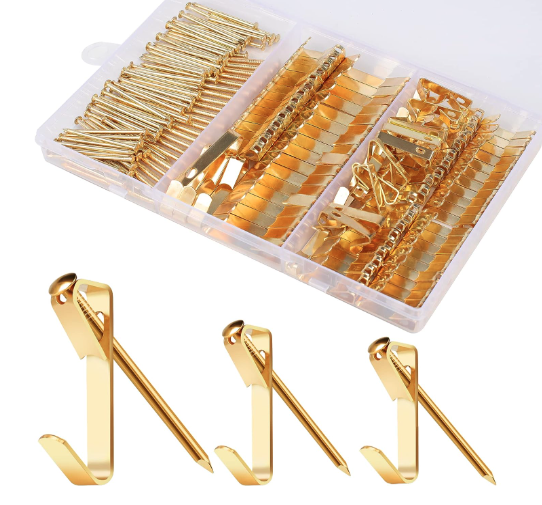
Step 4: Install wall studs or hooks
Choose appropriate wall studs, hooks, or other hanging devices based on the weight and size of your artwork. Make sure the equipment you choose can safely support each piece. Then, install these devices based on the locations you marked in step 3. Be careful when installing, safety is the most important thing. Safety comes first.
Finally, hang your art on the wall. Make sure the center point of each piece is aligned with the location you marked in step 3. Gently hang each piece on the wall, making sure they are securely attached to the wall. After you hang it, you can use the spirit level to measure whether it is balanced. After all, pursuing perfection is my favorite attitude.
image from pinterest
After completing the above 5 steps, you have successfully created an eye-catching gallery wall. Not only can you enjoy your favorite art, but it also adds magnificence to your home’s décor. If you want a home full of personality and style, consider hanging a gallery wall to show your style to the world.